Getting Started
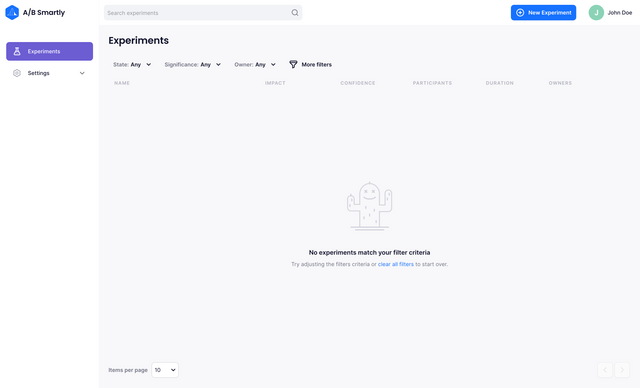
Welcome to your Web Console dashboard! This is where you will create, view and monitor your experiments.
You're almost ready to start creating your first experiment! But first we have to tell the dashboard how, where and why you want to run your tests.
Creating A Unit
Units are the unique identifiers that are going to be used to generate a variant.
For experiments running across different platforms (iOS, Android, web, email, etc.) the
unit should be known across all of them. Most likely the authenticated
user's user_id.
Have a look at the Tracking Unit section of the Creating an Experiment docs for more information.
To define your first Unit go to Settings > Units and click on Create Unit.
All that needs set here is the name of your unit. We recommend that you give
it the same name as it's referenced in your code.
Feel free to add a description, so the rest of your team knows what the unit will reference to and why it exists.
Setting Your Applications
When creating an experiment, you will be asked which platforms the experiment will run on.
To set these up, navigate to Settings > Applications and click Create Application.
Similarly to Units, you can name these whatever you want and add a description
to define it more for your team. Some examples of application names might be
ios, android or www.
Once your applications are defined, you're ready to move on to...
Setting Your Goals
Goals are the names given to processes that you will later track in your code.
To setup your first goal, head to Settings > Goals and click on Create Goal.
The goal name will be used in your code, so we recommend using a keyword-like
or kebab-case name. For example, newsletter_subscription, cpu_load_time or
bookings.
Tags are useful for searching, filtering and classifying your
goals. We recommend prefixing each tag with the tag's type. For example,
location:Header, stack:Backend or psychological:Trust.
Creating A Metric
Lastly, you will need to create some Metrics! Metrics are the parameters that will be used to track your goals. They can give you insights about your business, your users' behavior, the performance of your system and more!
To create a metric, head to Settings > Metrics and click on Create Metric.
Each metric needs a name. Some examples of metrics trackable metrics
might be Bookers, Bookings or Time to Book. You can also give your
metric a description for clarity across your team.
Metric Impact
Next, you need to choose your metric's impact. For this, you have three choices - positive, negative or unknown.
| Positive | Negative | Unknown |
|---|---|---|
A metric with a positive impact means that if it is increased, it's good for your business. For example, Bookings, Revenue and Subscribers would all be positive metrics. | Metrics with a negative impact, on the other hand, are bad for business if they increase in frequency. For example, Unsubscriptions or Account Deletions. | Metrics with an unknown impact are used when the effect of the metric could be either positive or negative. For example, Time on Page could be positive or negative depending on whether the user is engaged, versus whether they are lost. |
Metric Type
Next up is the metric's type. There are 4 types to choose from:
Goal Unique Count
Goal Unique Count is used when you want to automatically track the amount
of unique users (units) who performed a goal. Bookers is a good
example of this as you want to track the amount of people who booked, not the
total amount of bookings. For that you would choose...
Goal Count
Goal Count is used for when you want to track every instance of a goal being
achieved. Bookings is a good example for this one, as a single user may
have made multiple bookings.
Goal Time to Achievement
Goal Time to Achievement is the amount of time between the user being
exposed to your experiment and achieving a goal. This is tracked
automatically by all of our SDKs.
Goal Property
Goal Property is used when you want to use your own properties for tracking
a metric. For example, you may wish to track the Revenue made during your
experiment. This will be done by passing the revenue as a property when tracking
your goal. For example, in the Javascript SDK it would look like this:
context.track("goal_name", { revenue: 99.99 });
Selecting Goal Property in the Metric Type field adds some extra fields to
the form. You can learn more about these in the
goal property fields section.
Goal Retention
Goal Retention metrics are used to track data when a user has achieved a
goal after a set period of time from when they were first exposed to
the experiment or from their first achievement of the same goal.
For example, you could track whether users who left items in their checkout
cart came back to make a purchase after one week (maybe after receiving an
automatic reminder email). This could be done by creating a Retention Metric
that tracks a checkout goal and setting the Retention Period to 7 days.
Goal Ratio
A Goal Ratio metric tracks two goals and divides one by the other. When
selecting Goal Ratio from the Metric type dropdown, you will be presented with
two goal selection sections - a numerator and a denominator.
This metric type is useful for tracking data like click-through-rate. For example,
you could choose clicked_signup_button as the numerator goal, and
visited_landing_page as the denominator goal. This metric will now track the
CTR of the signup button on the landing page.
Internally, the variance of these metrics is automatically adjusted using the delta method.
Metric Goal
The Metric Goal is the goal which your metric relates to. This field will
provide a dropdown of any goals that you set up in the Setting Your Goals section.
Goal Property Fields
If your metric is of Goal Property type, you will have to fill in some
extra information on where the property value will come from and how you want
it to be formatted on the dashboard.
Upon selection, you will be presented with 4 more fields.
Source Property
This field defines where the property value comes from in your track call. For example, if you were to call the track method in your code with the following parameters:
context.track("revenue", {
  payment: {
    provider: "paypal",
    revenue: 99.99,
    currency: "USD",
  },
});
And you want to use the revenue made as your metric's source property, you
would pass payment/revenue into the Source Property field.
Format String
The format string defines how you would like your values to be presented in
the Web Console. Both the values and the mean of your data can be customised
this way. The curly braces {} represent the value and you can put
whatever you like around it. For example, if you wanted to track your
incoming revenue in dollars, you might want your Format String to be ${}.
This would cause a value of 1000 to be presented on the dashboard as $1000.
Below the Formatting fields, you can see a preview of how your value will be formatted.
Scale of Value
The scale of value is a multiplier for your value. This is useful if,
for example, your revenue is tracked in cents. You could set the metric's
scale of value to 0.01 and a revenue value of 100000 cents would show itself
as $1000.
Precision
The precision option allows you to set a number of decimal places that your
value can have. Set this to 2 and a revenue value of 1000.455 will be
presented as $1000.46.
Outliers
Outlier limits force extreme metric values to be within a specified range to reduce variance. There are four options to choose from:
| Method | Description |
|---|---|
| Unlimited | No outlier treatment is performed and outliers are included in the data as normal. |
| Quantile | Limits outliers to quantiles, where you can choose your own lower and upper quantile limits. |
| Standard Deviation | Cap each value to a multiple of the standard deviation of all seen values. |
| Fixed | Allows you to limit outlier values to specific upper and lower values. |
Property Filters
Property Filters allow you to filter your metrics to make them more specific.
Let's take our example track call from earlier:
context.track("revenue", {
  payment: {
    provider: "paypal",
    revenue: 99.99,
    currency: "USD",
  },
});
If you are tracking your revenue, you may want to limit the metric to amounts
that were paid in dollars. This can be done by adding a property filter where
payment/currency - Is - USD. Now, only amounts paid in dollars will be
tracked by this metric.
In this use-case, you might want to rename the metric to Revenue in Dollars.
Goal Relations
Goal Relations allow you to update the value of a goal when another foreign goal, related to the metric's goal, is achieved.
The two goals are related through a common unique key, present in both goals' properties, for example, transaction_id or order_id.
This is useful, for example, when a user requests a refund. You may want to update the Revenue metric
to subtract the amount of the refund from the total revenue.
To add a Goal Relation, click the Add relation button.
Relation Type
The Relation Type defines what happens to the value of the goal when the other goal is achieved. There are three options:
| Relation Type | Description | Metric Type |
|---|---|---|
| Cancellation | The initial value of the goal achievement is nullified. | All metric types |
| Refund | The new value from the foreign goal is added to or subtracted from the initial value from the goal achievement. | Goal Property metrics |
| Replacement | The initial value of the goal achievement is replaced with the foreign goal achievement's value. | Goal Property metrics |
Current goal relation key property
The Current goal relation key property defines the property that will be used to identify the goal achievement that
will be updated. In our refund example, this could be order_id.
Refund operation (only for refund relations)
The Refund operation defines whether the value of the foreign goal achievement will be added to or subtracted from
the initial value of the goal achievement. For example, if you have a Revenue metric that tracks the amount property of
a Purchase goal, and you have a Refund goal that represented its value as a negative number, you would want to
add the value of the Refund goal achievement to the Revenue goal achievement.
Foreign goal
The Foreign goal defines the goal that will be used to update the value of the current goal. In our refund example,
this would be the Refund goal.
Foreign goal relation key property
The Foreign goal relation key property defines the property that will be used to identify the goal achievement that
will be used to update the value of the current goal. In our example, this would also be order_id.
Foreign goal relation value property (only for replacement and refund relations)
The Foreign goal relation value property defines the property that will be used to update the value of the current goal.
For example, refund_amount.
Duplicated foreign goal aggregation (only for replacement and refund relations)
The Duplicated foreign goal aggregation defines how the value of the foreign goal achievement will be aggregated
when there are multiple foreign goal achievements that match the Foreign goal relation key property.
There are five options:
| Aggregation Type | Description |
|---|---|
| Pick first | The first foreign goal achievement will be used to update the value of the current goal. |
| Pick last | The last foreign goal achievement will be used to update the value of the current goal. |
| Sum | The sum of all foreign goal achievements will be used to update the value of the current goal. |
| Minimum | The minimum value of all foreign goal achievements will be used to update the value of the current goal. |
| Maximum | The maximum value of all foreign goal achievements will be used to update the value of the current goal. |
The Next Step
Now you have your units, applications, goals and metrics set up, you're ready to move on to the next chapter - creating an experiment!