Advanced Settings
The dashboard settings page is your place to set up parts of your experiments.
API Keys
API keys are used to allow access to the API from your applications.
Each key can have 3 permissions:
- Making requests to the SDK
- Accessing the SDK context endpoint
- Fetching experiment data from the API
API keys are independent of environments. The same key can be used in both production
and development environments.
CORS Origins
In CORS Origins, you can declare all the domains which are allowed to access the API. These can be written as a specific domain or you can pass in a RegEx pattern to allow for a myriad of domains.
Environments
Environments can be of type production or development. You can have as many
environments of each type as necessary.
Production environments will only be running production experiments.
Development environments run both production and development experiments, but
development experiments only collect data from development environments, and
production experiments only collect data from production environments.
Roles
The Roles section allows you to customize and give specific permissions to the users of your Web Console.
Segments
Segments are used to slice up your metrics based on different attributes. For example, you may be passing the following as attributes in an experiment:
context.attributes({
    customer_age: 'new_customer',
    url: location.toString(),
    user_agent: navigator.userAgent,
    referrer: document.referrer,
    screenName,
    pageName,
    country: headers['HTTP_CF_IPCOUNTRY'],
    language: headers['Accept-Language'],
    channel: query_params.utm_medium
})
If the utm_medium is something that would be interesting to segment the data
on, you could create a Channel segment with the Source attribute set to
channel.
Additionally, if you have the User-Agent parser turned on, ABsmartly will parse the UA
string passed on the user_agent attribute and automatically create the
following attributes for you:
user_agent/browser: Chrome, Edge, Firefox, Safari...user_agent/browser_type: Browser, Email, Crawler...user_agent/device_type: Desktop, Mobile, Tablet...user_agent/platform: Android, iOS, Mac OS X, Windows...user_agent/crawler: yes, no
Pass one of those keys in the Source attribute field to automatically create a segment based on the respective information from the User-Agent string.
Tags
Both experiments and goals can be given tags. This can be useful for searching through your goals and experiments to find a specific one.
We recommend prefixing each tag with the tag's type. For example,
location:Header, stack:Backend or psychological:Trust.
Users
In Users, you can create and give permissions to the users who should have access to the platform.
Webhooks
Webhooks can be used for custom integrations. For example:
- Invalidating the CDN’s cache of the data file with any experiment being started or stopped.
- Sending all actions, notifications, and comments to a Slack channel.
- Synchronizing the status of a Jira ticket with the status of the respective experiment.
Have a look at our Slack integration guide for an example of how to use Webhooks, or checkout our example Github repository for a more comprehensive code example!
Webhooks are available for all experiment, goal and metric events on the Web Console, namely:
- Experiment Created
- Experiment Started in Development
- Experiment Started
- Experiment Stopped
- Experiment Restarted
- Experiment Put Full On
- Experiment Edited
- Experiment Commented On
- Experiment Archived
- Experiment Unarchived
- Experiment Alert Created
- Experiment Ready To Start
- Metric Created
- Metric Edited
- Metric Archived
- Goal Created
- Goal Edited
- Goal Archived
Payloads
The JSON payloads of each Webhook event are as follows:
Experiment Created
{
  "event_name": "ExperimentCreated",
  "event_at": 1608560579651,
  "id": 7,
  "name": "example_experiment",
  "user_id": 1,
  "comment": "example note"
}
Experiment Started in Development
{
  "event_name": "ExperimentDevelopment",
  "event_at": 1608560579651,
  "id": 7,
  "name": "example_experiment",
  "user_id": 1,
  "comment": "example note"
}
Experiment Started
{
  "event_name": "ExperimentStarted",
  "event_at": 1608560579651,
  "id": 7,
  "name": "example_experiment",
  "user_id": 1,
  "comment": "example note"
}
Experiment Stopped
{
  "event_name": "ExperimentStopped",
  "event_at": 1608560579651,
  "id": 7,
  "name": "example_experiment",
  "user_id": 1,
  "comment": "example note"
}
Experiment Restarted
{
  "event_name": "ExperimentRestarted",
  "event_at": 1608560579651,
  "id": 7,
  "name": "example_experiment",
  "user_id": 1,
  "comment": "example note",
  "new_experiment_id": 8,
  "new_experiment_state": "development"
}
Experiment Put Full On
{
  "event_name": "ExperimentFullOn",
  "event_at": 1608560579651,
  "id": 7,
  "name": "example_experiment",
  "user_id": 1,
  "comment": "example note",
  "full_on_variant": 2
}
Experiment Edited
{
  "event_name": "ExperimentEdited",
  "event_at": 1608560579651,
  "id": 7,
  "name": "example_experiment",
  "user_id": 1,
  "comment": "example note",
  "changes": {
    "description": "example description updated",
    "applications": [1, 2],
    "other": "example other updated",
    "prediction": "example prediction updated",
    "percentages": "50/50",
    "percentage_of_traffic": 95,
    "implementation_details": "example implementation details updated",
    "hypothesis": "example hypothesis updated",
    "action_points": "example action points updated",
    "owners": [1, 19],
    "secondary_metrics": [
      {
        "goal_id": 1,
        "goal_value_id": 9
      },
      {
        "goal_id": 5,
        "goal_value_id": 17
      }
    ],
    "tags": [1, 2],
    "teams": [1, 5],
    "variants": [
      {
        "variant": 0,
        "name": "control",
        "config": null
      },
      {
        "variant": 1,
        "name": "variant",
        "config": "{\"a\": \"b\"}"
      }
    ]
  }
}
Experiment Commented On
{
  "event_name": "ExperimentCommented",
  "event_at": 1608560579651,
  "id": 626,
  "experiment_id": 7,
  "user_id": 1,
  "reply_to_note_id": 5,
  "comment": "example comment"
}
Experiment Archived
{
  "event_name": "ExperimentArchived",
  "event_at": 1608560579651,
  "id": 7,
  "name": "example_experiment",
  "user_id": 1,
  "comment": "example note"
}
Experiment Unarchived
{
  "event_name": "ExperimentUnarchived",
  "event_at": 1608560579651,
  "id": 7,
  "name": "example_experiment",
  "user_id": 1,
  "comment": "example note"
}
Experiment Alert Created
{
  "event_name": "ExperimentAlertCreated",
  "event_at": 1608560579651,
  "id": 102,
  "type": "audience_mismatch",
  "experiment_id": 288,
  "created_at": 1661958869000,
  "updated_at": 1663243653000,
  "metadata": "{ \"ramala\": \"jamala\" }"
}
Experiment Ready To Start
{
    "event_name": "ExperimentReady",
    "event_at": 1608560579651,
    "id": 7,
    "name": "example_experiment",
    "user_id": 1,
    "comment": "example note"
}
Goal Archived
{
    "archived": true,
    "name": "Example Goal",
    "event_name": "GoalArchived",
    "event_at": 1674470115161,
    "id": 95,
    "user_id": 89
}
Goal Created
{
    "name": "Example Goal",
    "description": "Example goal description",
    "archived": false,
    "event_name": "GoalCreated",
    "event_at": 1674465526780,
    "id": 95,
    "user_id": 89
}
Goal Edited
{
    "name": "Example Goal",
    "description": "Example goal description",
    "goal_tags": [
        17
    ],
    "owners": [
        64
    ],
    "teams": [
        1
    ],
    "event_name": "GoalEdited",
    "event_at": 1674468687624,
    "id": 95,
    "user_id": 89
}
Metric Archived
{
    "archived": true,
    "name": "Example Metric",
    "event_name": "MetricArchived",
    "event_at": 1674205693525,
    "id": 158,
    "user_id": 89
}
Metric Created
{
    "property_filter": "{\"filter\":{\"and\":[]}}",
    "outlier_limit_upper_arg": null,
    "outlier_limit_method": "unlimited",
    "precision": 1,
    "description": "Example metric description",
    "scale": 1,
    "type": "goal_unique_count",
    "archived": false,
    "goal_id": 69,
    "value_source_property": "",
    "effect": "positive",
    "name": "Example Metric",
    "format_str": "{}",
    "outlier_limit_lower_arg": null,
    "event_name": "MetricCreated",
    "event_at": 1674204454990,
    "id": 158,
    "user_id": 89
}
Metric Edited
{
    "goal_id": 78,
    "outlier_limit_upper_arg": {
        "scale": 0,
        "value": "Fg=="
    },
    "outlier_limit_method": "quantile",
    "effect": "negative",
    "name": "Example Metric",
    "description": "Example metric description",
    "type": "goal_count",
    "outlier_limit_lower_arg": {
        "scale": 0,
        "value": "AQ=="
    },
    "metric_tags": [
        1,
        7
    ],
    "owners": [
        81
    ],
    "teams": [
        1
    ],
    "event_name": "MetricEdited",
    "event_at": 1674236301978,
    "id": 158,
    "user_id": 89
}
Platform Settings
The Platform settings page allows you to make changes to the platform itself, such as what fields are required when creating an experiment.
Metadata
In the Metadata section, you can select the visibility of the metadata fields
when creating an experiment. The options are Optional, Required and Hidden.
- Optional: The field will be visible, but not required.
- Required: The field will be visible and required.
- Hidden: The field will not be visible.
Custom Fields
In the Custom Fields section, you can customise the Metadata step of the experiment creation form with your own Sections and Fields.
By default, there will be one section here called Description with 5 fields in it:
- Hypothesis
- Prediction
- Purpose
- Implementation Details
- Action Points
- Other
Adding Sections
You can add more sections by clicking the Add Section button.
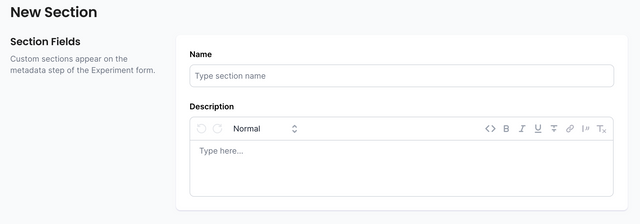
The Section name will be the title of the section, similar to the title Section Fields in the image above.
The description will be the text that appears below the section title. In the above image it is
Custom sections appear on the metadata step of the experiment form.
Click Create Section to continue and start adding some fields to the section.
Adding Fields
To add a field to a section, click the Add Field button under the desired section.
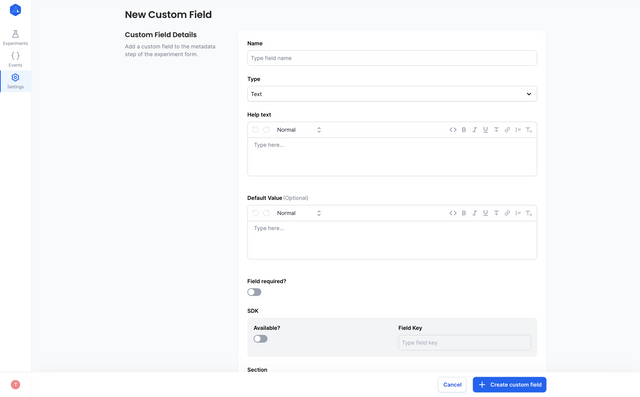
Here, you will be able to set up the field with the following options:
- Name: The name of the field. This will be the label of the field in the form.
- Type: The type of the field. This will determine what kind of input the field will be.
Currently, we support:
- Text - Rich Text Editor
- String - Input
- Number - Input
- JSON - JSON Editor
- Boolean - Switch
- Help Text: The help text of the field. This will be the text that appears above the field in the form.
- Default Value: The default value of the field. This will be the value that appears in the field when the form is loaded. This can be useful for adding a template to a Text or JSON field.
- Field Required: Whether the field is required. If required, the user will not be able to submit the form without filling in the field.
- Available?: Whether the field will be available in the SDK. If available, the field will be included in your context data in the ABsmartly SDKs.
- Field Key: The key of the field. This will be the key of the field in the context data. This is only required
if the
Availablefield is set totrue. - Section: The section that the field will be in. This will be prefilled with the section that you clicked
the
Add Fieldbutton under, but can be changed if necessary.
Click Create Field to add the field to your section!
Field and Section Actions
On the right hand side of each section or field, there are 4 buttons:
- Edit: Clicking this button will open the edit form for the section or field.
- Archive: Clicking this button will archive the section or field. Archived sections and fields are no longer visible on the experiment form.
- Move Up: Clicking this button will move the section or field up in the list of sections or fields.
- Move Down: Clicking this button will move the section or field down in the list of sections or fields.
You can use these action buttons to edit, archive, or reorder your sections and fields.